Planning application guide
If your application does not include the information we need for assessment, it may be made ‘invalid’.
Our guide will explain what information is needed to validate basic planning applications. It will help to highlight common problems and explain how to avoid them.
You can download our planning guide to help you with your application.
Planning application minimum checklist
To meet the minimum requirements, you must include:
- a complete application form that includes the correct ownership certificate: A, B, C or D
- a site location plan clearly outlined in red - scale 1:250 or 1:2500
- a site or block plan clearly outlined in red (existing and proposed) - scale 1:200 or 1:500
- existing floor plans and elevations – scale 1:50 or 1:100
- proposed and existing roof plans – scale 1:50 or 1:100
- a section drawing with existing finished floor levels (required where there is a change in levels or the site is sloping) – scale 1:50 or 1:100
- the correct application fee
Common reasons for invalid applications
Your application will be marked as invalid if the:
- development site is not clearly outlined in red on the location plan
- scale bar is inaccurate or not included
- direction of north is not shown on plans
- drawings are not labelled clearly or correctly
- drawings are not drawn to a recognisable scale
- wrong application form was used or not completed
- fee was not paid, or you paid the wrong fee
- information or plans are inaccurate
- floor plans and elevations do not match
- wrong ownership certificate is completed
- scheme proposals are incomplete
It will also be invalid if you are missing:
- tree surveys
- arboricultural assessments
- design and access statements
- heritage statements
- flood risk assessments
- plan numbers
Scaled plans
Accurate scaled plans are required for all applications. We suggest that you hire a planning agent or architect to submit your application on the planning portal.
National and local validation requirements
National validation requirements are set by the government. They are the same for all Planning Authorities in England.
Local validation requirements set out the conditions and documents needed for planning applications in Maidstone and Swale borough councils.
Planning application advice
Certificates of ownership
Most planning applications require a completed application form with a certificate of ownership. The correct certificate must be fully signed and dated.
Certificate A: sole owners
Submit this certificate if you are the sole owner of the application site and it is not an agricultural holding.
Certificate B: third party ownership
You should use this certificate if:
- a third party (for example, Kent County Council (KCC) highways or a neighbour) owns part of the application site or;
- the land is in an agricultural holding
In this case, you must give notice to the third party. They must be given at least 21 days to respond. The definition of “owner” is explained in the application form.
Certificates C and D: unknown landowners
These certificates are for when not all the landowners are known. You will need to publish a formal notice in a newspaper.
Descriptions
All descriptions should be accurate and clear. It should not be used to justify your proposal.
A poor description will not invalidate your application. However, it may cause a delay in processing until a better description is agreed.
A good description will highlight the part of the proposal that needs planning permission. You do not need to use lots of words. For example, say “single storey rear extension” instead of “we would like to make our kitchen bigger with an extension”.
Application fees
As part of the validation process, the fee will not be deemed received until it is in the authorities bank account.
Plans and drawing requirements
Plans and drawings must be drawn to an identified scale. All plans must show the direction of north. You do not need to include a linear scale bar, but it is useful for online submissions.
Site location plan descriptions
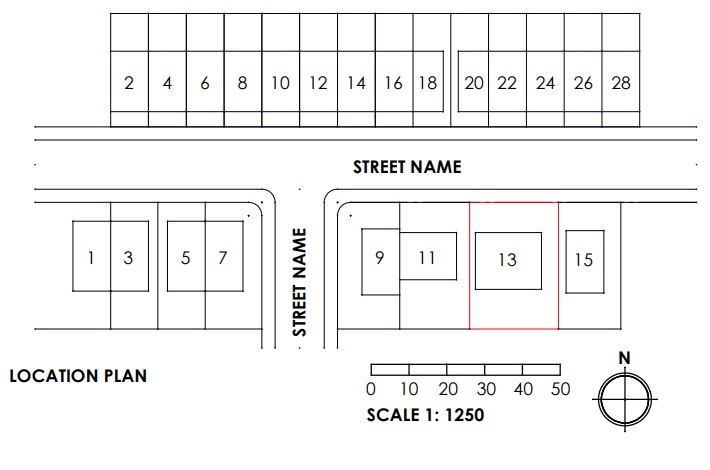
You must identify your property within its surrounding area. If you are submitting the application yourself, you can purchase a basic location plan from the portal.
Use a scale of 1:1250 or 1:2500 and base it on an up-to-date map. You should show:
- a scale bar
- the direction of north
- surrounding adjoining buildings
- ideally at least two named roads
Properties shown should be numbered or named to ensure that the exact location of the application site is clear.
The application site must be clearly outlined with a red line. Include:
- all land necessary to carry out the proposed development
- any private access to the adopted highway
- any private access to visibility splays
A blue line must be drawn around any other land that you own which is close to or adjoining the application site.
An example of an acceptable plan can be seen below:
Site and block plans
These are two separate plans; existing and proposed.
Existing plans should show what the site looks like at the time of your application. Proposed plans should show your planned extension and any other works you would like to do.
Both plans should show:
- the whole area of land involved
- road names, footpaths, and access arrangements
- existing extensions, outbuildings, and sheds
- any public rights of way on and around the site
- parking areas, walls, and fences
- the position of trees
- any hard surfacing and type
- the scale bar
- the north arrow
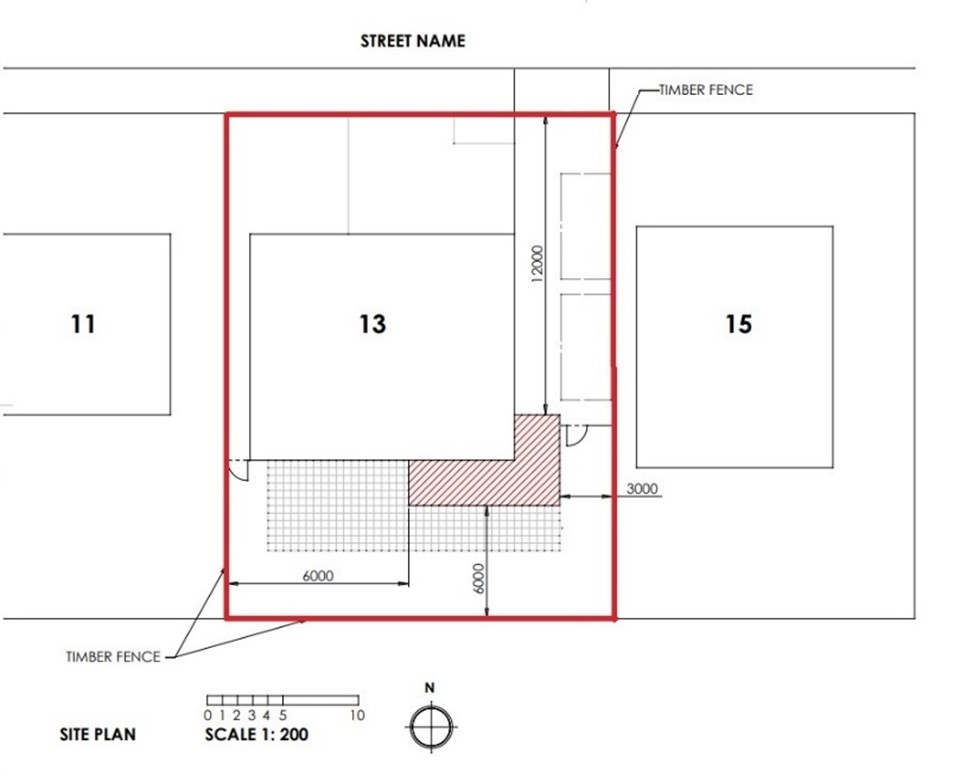
Plans must be drawn at a scale of 1:200 or 1:500
You can buy outline plans from the Planning Portal, but you will need to add the features. Below is an example of an acceptable proposed site plan:
Existing plan examples
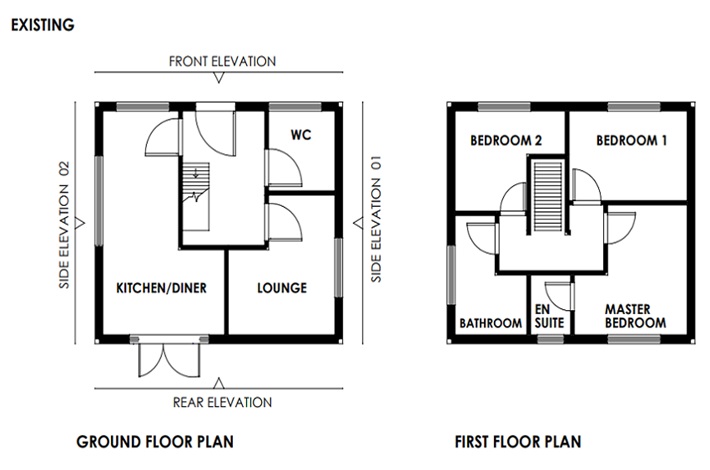
Existing floor plan scale 1:50 or 1:100
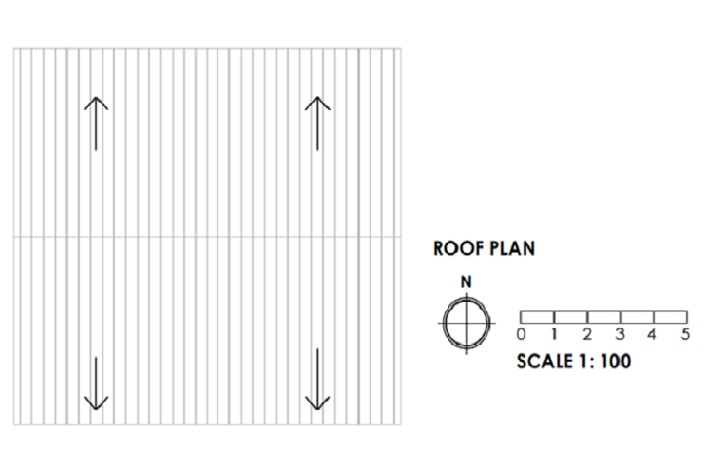
Existing roof plan scale 1:50 or 1:100
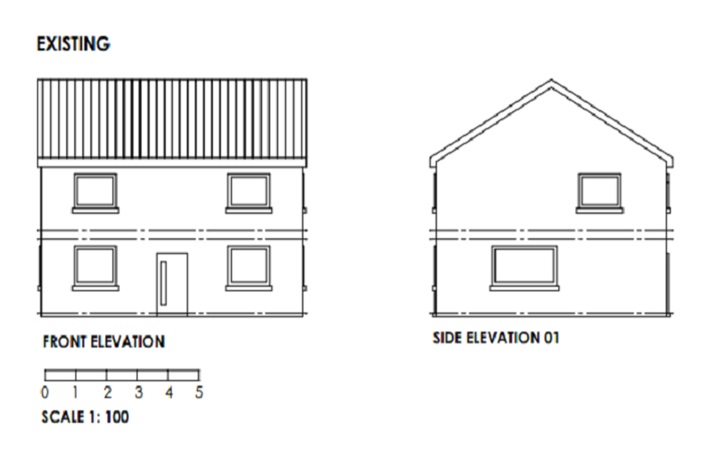
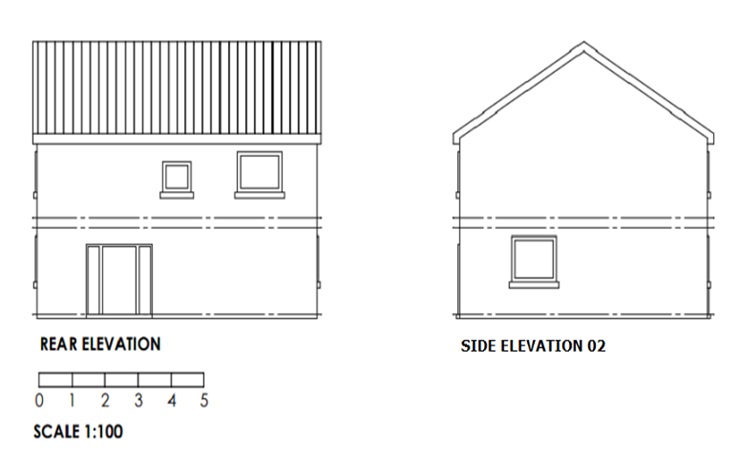
Existing elevations scale 1:50 or 1:100
Drawings must clearly show the existing appearance of the building with a scale bar.
Proposed plan examples
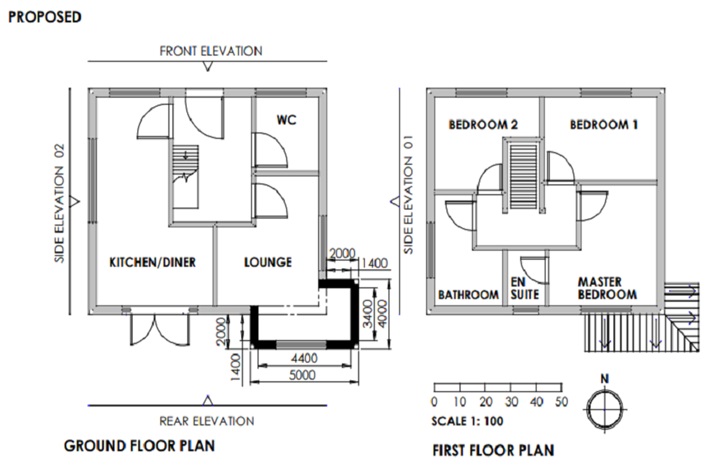
Proposed floor plan scale 1:50 or 1:100
You should highlight any walls that will be demolished during your build.
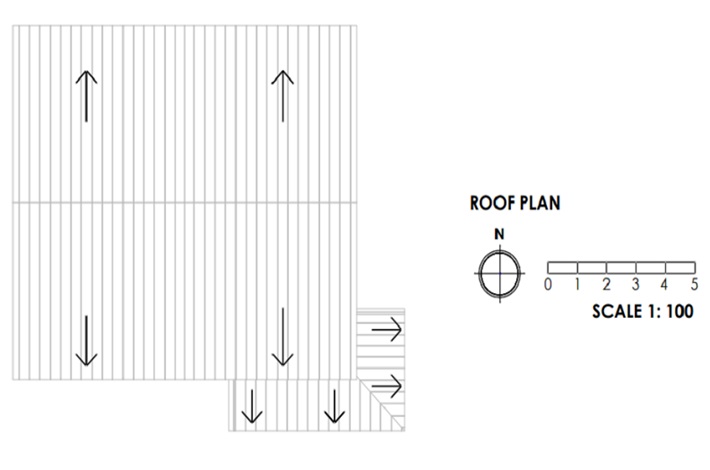
Proposed roof plan scale 1:50 or 1:100
Plans should show the general layout of the building. It should be easy to identify. Include the shape of the roof and any areas that have been cut-away or proposed to be used for balconies. A north arrow and a scale bar should be included.
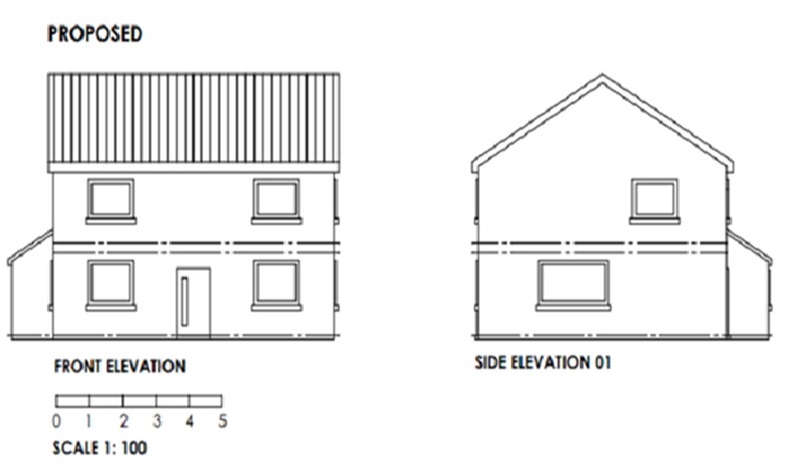
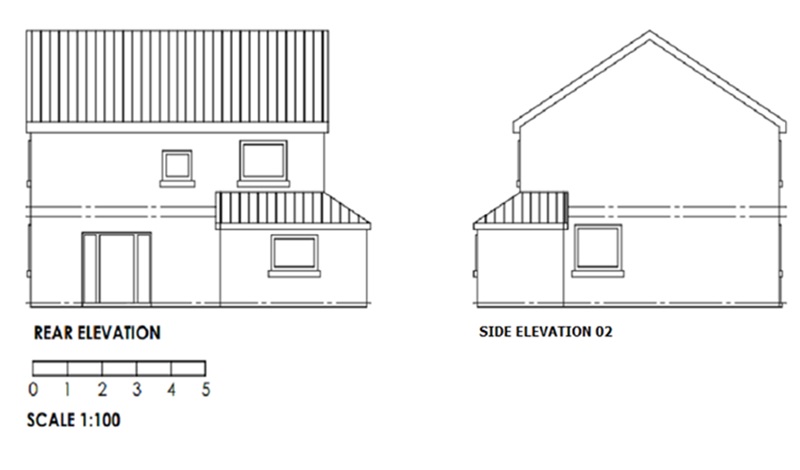
Proposed elevations scale 1:50 or 1:100
You should show the general layout of the building including windows and doors with a scale bar.
Site level and sections
If your proposed works include a land level change you will need to include these plans in your application.
Plans should show the existing and proposed levels of the site. Highlight how they are different from the land and buildings that join the site. You should use a scale bar of 1:50 or 1:100.